

The quick version
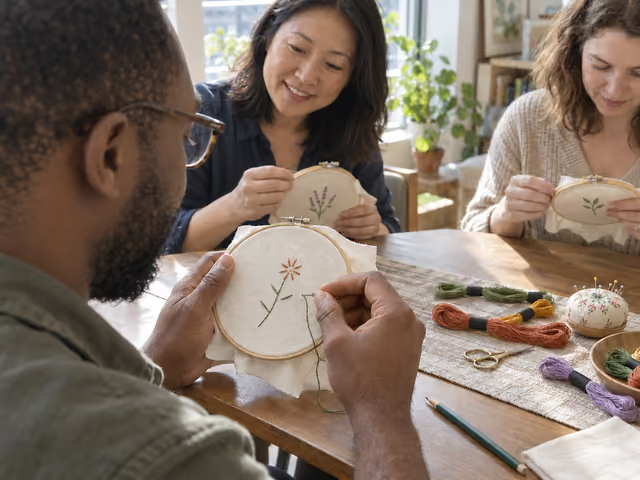
Give everyone a hoop and fabric. Draw a small stem, four short leaves and a flower of separate radiating lines. Practice starting a thread and making a few backstitches, then stitch the stem, leaves and flower. Work alongside one another rather than taking game turns. Secure the threads, show the finished motifs and put every needle away. There are no points or winner.
Saved on this device only — clearing your browser's cache or site data removes them (no account backup).
Prepare a small project for everyone
This house format hosts 2–6 people, including the host, making decorative surface embroidery on plain fabric. It does not repair a garment or use a counted cross-stitch chart. No particular kit or purchased edition is required.
For each person, provide one approximately 15 cm embroidery hoop, one approximately 25 cm square of washed and pressed non-stretch woven cotton, a separate practice scrap large enough for the hoop, one sharp embroidery needle with an eye that comfortably takes two strands, and one skein each of two colors of six-strand cotton embroidery floss. Green and a flower color make the example easy to follow. Bring a pencil or suitable fabric-marking tool, one shared ruler, small scissors and a pincushion or closed needle case. A single pair of scissors can be passed when needed. A needle threader or thimble is optional.
Use an indoor table with a seat and clear elbow space for everyone, good light and an uncluttered place to set tools. Keep food away from fabric and needles. The host practices the two stitches and thread start beforehand; keep these instructions printed or demonstrate from them. Choose a closing point together, allowing for practice, individual stitching and a final look at each project. The pattern is intentionally small, but completion time depends on experience.
Center the practice scrap over the inner hoop ring, press the outer ring over it, then gently smooth the fabric outward and tighten the screw. The fabric should be firm and flat rather than stretched out of shape. Readjust if it sags. After practice, put the main square in the hoop the same way. Lightly draw a curved stem about 5 cm long, four short diagonal leaf lines and a ring of about eight separate short petal lines at the top. Leave a small unstitched gap at the flower center. These original marks are the entire pattern; no download is needed. Pencil lines must be faint enough to cover with stitches; test other marking tools and their removal on scrap first.
Start with a secure two-strand thread
For this loop start, cut about 70 cm of six-strand cotton floss. Gently pull out one individual strand, letting the remaining bundle gather without yanking. Fold that single strand in half and thread its two cut ends through the needle together. This gives two working strands and about 35 cm of thread. Keep the folded loop at the far end; do not tie the thread to the needle.
Mark two nearby points A and B on the practice line. From the front, push the needle down at A, leaving the folded loop above the fabric. Bring it up at B, one small stitch length away, and pass the needle through that loop. Put the needle down again at B through the same hole; gently draw the loop to the back. The resulting first straight stitch lies between A and B and anchors the thread. Keep the short cut ends at the needle eye from slipping out. This start is for the even two-strand cotton thread used here; it is not a universal start for every embroidery thread.
Stitch a stem, leaves and flower
Practice a connected line
With the first stitch A–B anchored, bring the needle up at C, one small stitch length farther along the line. Take it down at B, into the same hole where the previous stitch ended. Continue by coming up farther ahead and returning to the previous endpoint. That is backstitch. Practice several short connected stitches; shorten them on curves. Let the thread rest on the cloth rather than pulling it hard enough to pucker. Secure the practice thread using the finishing step below and remove the needle before setting the scrap aside.
Work the stem
Change to the main fabric and start a green thread with the same loop method at the bottom of the stem. Continue in backstitch along the drawn curve. Everyone stitches at their own pace; there is no turn order. Ask for a demonstration when needed, and let the project owner decide whether a stitch should be removed.
Add short leaves
At a nearby leaf line, bring the needle from the back to one end and down at the other: one straight stitch makes that leaf. Complete the four leaf lines. Keep the leaf stitches short so they do not hang loosely; they are decorative lines, not filled shapes. If a move would leave a long loose thread crossing the back, end the thread and start again nearer the next leaf.
Change color for the flower
Secure the green thread using the finishing method below. Use the loop start in the flower color to make the first petal line. Make the remaining separate short radiating straight stitches around the open center. Small variations in spacing are fine; keep every stitch flat. When thread becomes too short to steer the needle comfortably, secure it and start a new length.
Secure and share
Take the needle to the back. Slide it under the backs of two or three nearby stitches without piercing through to the front; turn back under the last stitch, then pass under a few more to lock the thread before trimming the spare end. Check with a gentle tug. Show your motif and name a stitch or detail you enjoyed making. No points, ranking or tie-break is needed.
Put scrap in a hoop and demonstrate one loop start and three backstitches. Let each person try them before committing to the main fabric. The scrap is practice; the finished decoration is on the separate square.
Finish the piece and the session
A completed project has its small motif stitched, both thread colors secured and loose working ends trimmed. Take it out of the hoop and keep the full fabric square as a decoration for later framing or another craft project. Do not cut away its surrounding margin. Framing, backing, attaching it to clothing and washing are separate finishing choices; follow the actual fabric, floss and marking-product instructions before doing them.
Close after everyone has finished and shared, or at the closing point agreed at setup. If someone is still stitching, secure their current thread, remove the needle and take the project home to continue. Call it unfinished rather than rushing or inventing a winner. Remove the fabric from the working hoop between sessions to reduce lasting creases. Count the needles back into their cases and close the scissors before clearing the table.
Help a stitcher without taking over
Conversation can stay soft while hands work. Pause together to show a useful technique; people who already know it may continue. Ask before touching another person's hoop or demonstrating on their project. Pass closed scissors and store a needle whenever someone gets up. Do not hold needles in your mouth. Anyone who needs a break can put the tools away and return later; seated handwork still needs suitable vision and dexterity.
If backstitch looks broken, check that each return enters the previous endpoint, rather than a nearby new hole. If fabric gathers, undo the tight stitch and ease the pull; tightening the hoop cannot fix thread that is already too tight. If the thread twists, let the needle hang briefly over the work to unwind, keeping its point clear of people. Stop and loosen a knot rather than hauling it through the fabric. Shorter working lengths help reduce tangles.
Differences in stitch length or color are creative choices, not rule violations. Each maker chooses whether to redo a line; the host can demonstrate on scrap rather than taking over. Do not demand a spotless reverse side. For a missing needle, pause stitching, keep people away from the search area and find it before resuming or clearing up. This guide's small original flower and social finish are host suggestions, not DMC competition rules or a claim about a kit's contents.
Already know the game?
Ideas & Twists
Choose a variation together before you start.
Embroidery circle · See main rules
Make a small personal monogramStitched initials
House suggestion: replace the botanical pattern with one or two simple block capitals, drawn by their maker about 3 cm tall. Use backstitch for all letter outlines and straight stitches for a small border if wanted; do not fill letters. Start and end each disconnected line separately rather than carrying thread across open areas. One floss color is sufficient for this variation. Finish when the chosen letters are complete and ends are secure; keep the shared demonstration, conversation and unranked show-and-tell.
Embroidery circle · See main rules
Compare interpretations without scoringSame sprig, different choices
House suggestion: everyone draws the same small stem, four leaf lines and eight-petal flower described in setup, then independently chooses two colors from the group's shared floss. Keep the two-stitch method and separate projects; do not turn finishing speed into a contest. During the final seated share, each maker names one deliberate color or stitch-length choice, and the others may ask one question. End after each willing maker has shared, with no vote or winner. Obtain permission before photographing anyone or their project; photography is optional.
About this guide
DMC, RSN StitchBank and Mary Corbet explain the hoop, stitches and thread handling used here. The small flower, group format and variations are original suggestions. A purchased kit may require different materials or stitch counts.
Ready for something different?
Find another game →