

The quick version
Cut eight 2 m cords and one 80 cm hanging cord per person. Fold and attach the eight cords to a secured dowel, leaving sixteen strands. Tie five rows of square knots: four knots, three offset knots, four, three, then four. Check the knots before trimming the fringe and adding the hanging cord. Finish by showing one detail you learned; there are no points or winner.
Saved on this device only — clearing your browser's cache or site data removes them (no account backup).
Prepare one small hanging per person
This is an original five-row practice project using standard macramé knots. No commercial kit is needed. Host 2–6 adults, each with their own project, indoors at a table with enough space to separate sixteen strands at each place.
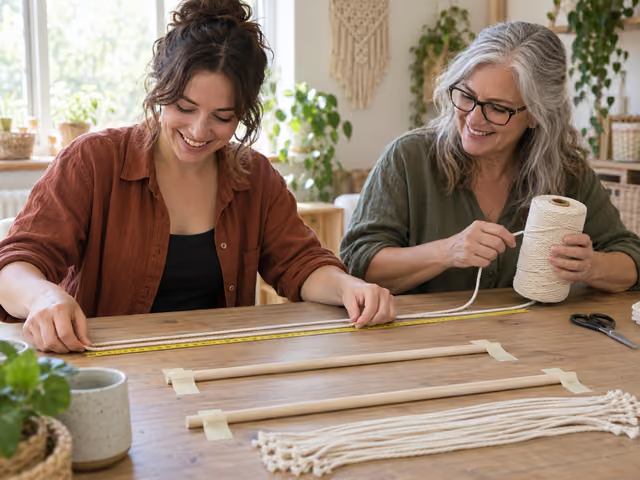
For each person: eight lengths of soft 3 mm cotton macramé cord, each 2 m long; one additional 80 cm length for the hanger; one smooth wooden dowel about 25 cm long and 10–15 mm thick; and two strips of masking tape long enough to secure its bare ends. That is 16.8 m of cord per person, or 33.6 m for two and 100.8 m for six, plus a little spare cord if available. Use the same cord thickness throughout a project. Chunky yarn and thicker rope need different allowances.
Share: a measuring tape or ruler for cutting and spacing, cord-cutting scissors, a table and chairs, and a protective table covering if the surface needs it. Check that the tape releases cleanly from the working surface. The host measures the first 2 m piece, then uses it to measure the other seven before cutting. Scissors can be passed between makers; nothing needs to be timed or recorded on a phone.
Lay the dowel horizontally near the far edge of your working area. Leave its middle 18 cm free for attachments and tape both bare ends firmly to the surface. Cords will run toward you over the table edge; keep them clear of chair wheels and feet. Gently test the hold before knotting. Sit where you can reach without leaning or lifting your shoulders; take a break or move the whole taped work to a more comfortable position when needed.
Attach eight cords with lark's head knots
Fold and loop
Fold one 2 m cord at its midpoint. Pass the folded loop over the dowel and down behind it. Bring both free ends through that loop and pull them evenly toward you to snug the attachment. This is a lark's head knot.
Count before continuing
Attach the other seven cords the same way. Spread the eight attachments evenly across the middle 18 cm, keeping the bare dowel ends clear. Each folded cord supplies two strands: count sixteen loose strands. Separate them left to right, without crossing them. Leave the 80 cm hanger aside until finishing.
Learn one complete square knot
Use the first four strands on the left. The middle two are filler strands: keep them straight. The outside two are working strands. First half: take the left working strand across the front of both fillers and underneath the right working strand, leaving a loop on the left. Take the right strand behind the fillers and forward through that left loop. Pull the two working ends gently and evenly.
Second half: use the strand now on the right to cross in front of both fillers and underneath the left working strand, leaving a loop on the right. Take the left strand behind the fillers and forward through that right loop. Tighten evenly against the first half. These two opposite halves make one square knot. Position its top about 2 cm below the dowel. Let everyone make this first knot before continuing; it counts as the first knot of row one.
If the group wants a visual demonstration, the linked knot tutorials show the hand movements. The written sequence here is enough to work offline. A square knot has two mirrored halves; repeating the same half makes a spiral instead.
Build five rows, then finish
Complete row one: four knots
Count positions from left to right. Knot strands 1–4, 5–8, 9–12 and 13–16, with each knot at the same height. The first one is already made. Keep each pair of filler strands straight and the tension gentle.
Offset row two: three knots
Leave strands 1–2 and 15–16 loose at the sides. Use strands 3–6, 7–10 and 11–14. Each new group combines two strands from each of two neighboring knots above. Tie one complete square knot per group, leaving about 2 cm of clear strand between the previous knots and these new ones. Keep the row level.
Alternate three more rows
For row three, use all sixteen strands in the same four groups as row one. For row four, use the same three offset groups as row two, again leaving the outer two strands on each side unused. For row five, return to the four groups. Leave about 2 cm of clear strand between rows. There are eighteen complete square knots in total: 4 + 3 + 4 + 3 + 4. Work at your own pace; there are no turns to wait for.
Check before cutting
Keep the dowel secured. Check sixteen strands, five rows, flat knots and no accidental crossovers. Gently spread the open squares with your fingers. If a knot is wrong, loosen its second half, then its first, and retie it. To correct an earlier row, undo the affected knots below it first. Do not cut a strand to fix a knot.
Trim and add the hanger
Choose a straight fringe edge at least 15 cm below the lowest knots, and within the length of the shortest remaining strand. Smooth all sixteen ends, measure the line and cut gradually with the scissors. Leave the cord ends plain; brushing is optional. Take the reserved 80 cm cord. At one bare dowel end, pass a free end around the dowel, cross that free end over its own upright cord to form a loop, feed it through the loop and pull snug. Repeat that loop-and-feed once more around the same upright cord. Make the same two knots at the other bare dowel end. Leave enough central slack for a hanging loop; adjust and tighten both ends. Test the loop while holding the dowel above the table, then remove the tape. Use it only to display this lightweight decoration.
Share the result
When everyone's hanging has five rows, a trimmed fringe and a secure hanger, invite each person to show one detail they like or one knot they learned. Anyone who chooses to pause can keep their cords untrimmed and name the next row before packing up. There is no scoring, ranking or tie to resolve. Gather offcuts and return tools to finish the session.
Keep the knotting comfortable and clear
Explain from the maker's left and right, rather than the observer's. Ask before reaching into someone else's project. Show a knot slowly, then let the maker redo it themselves. If someone is tangled, stop pulling and trace each of the four strands back to the row above.
A curling strip usually means the same half-knot was repeated. A net that narrows sharply may have uneven tension or too little space between neighboring groups. Check the two opposite halves, then loosen and reset the affected row. Small differences are part of learning; do not pull every knot tighter to make them match.
The 2 m cuts are this small project's preparation allowance, not a universal cord calculator or a guaranteed finished size. Tension changes consumption. If a working end gets too short to tie safely, leave the fringe uncut, undo the affected knots and redo them more gently. If necessary, remove row five from the whole piece and finish it as a four-row adaptation; explain that change rather than hiding a short cord with a join. Test different cord or an expanded design before cutting a whole group's supplies.
Keep scissors parked with their blades closed when not cutting and keep loose cords out of walkways. Hand control, sustained reach and cord handling can still be demanding in a seated craft. Offer breaks and preparation help without promising that every participant will find the same setup comfortable.
Already know the game?
Ideas & Twists
Choose a variation together before you start.
Macramé · See main rules
House color suggestionTwo-tone net
Replace the eight same-color project cords with four 2 m cords in one color and four in another, all the same 3 mm thickness and construction. Attach them in alternating colors. Keep the sixteen-strand count, five-row 4/3/4/3/4 pattern, spacing, fringe and hanger unchanged. Each maker chooses their colors; there is still no judging or score.
Macramé · See main rules
House pattern suggestionFour-column sampler
Replace the alternating net with four separate columns. Keep the same eight folded 2 m cords, but always work groups 1–4, 5–8, 9–12 and 13–16. Make five square knots down each column, leaving about 2 cm between complete knots. This uses twenty square knots and never joins neighboring columns. Check each column before trimming and use the same hanger and sharing finish.
Macramé · See main rules
House cooperative suggestionHelp each other finish
At the end of each complete row, pause together and invite a neighbor to check the row's knot count and mirrored halves. The maker keeps hold of their own project; anyone who wants hands-on help explicitly invites it. Resume when everyone is ready, or let a maker choose a break. All materials, sixteen strands, five rows, fringe and finish remain unchanged; checks earn no points.
About this guide
The linked tutorials explain lark's head and square knots. This small five-row practice project and its variations are STUDplay suggestions. Cord thickness and knot tension affect the finished size and cord use; check your work before trimming.
Ready for something different?
Find another game →