

The quick version
Bring a clean woven garment with a small hole and a patch that reaches sound fabric around it. Practice threading, securing the thread and making running stitches on scrap. Pin a patch over the hole, stitch its edges and add rows through both layers. Keep the other side of the garment clear of the needle. At the agreed closing point, secure your thread, remove pins, share progress and store every sharp tool.
Saved on this device only — clearing your browser's cache or site data removes them (no account backup).
Choose one small repair and gather supplies
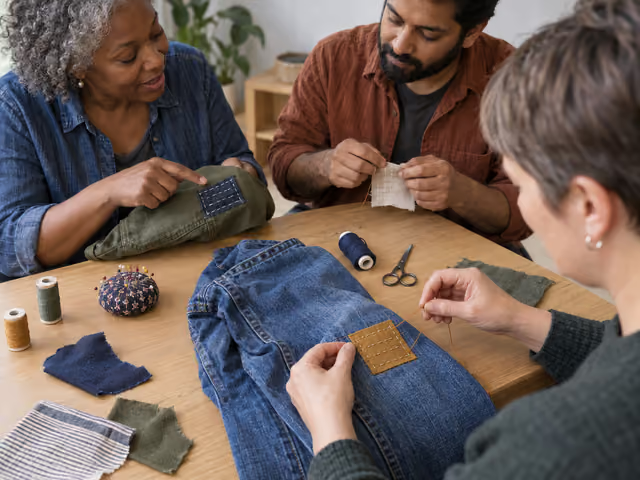
This is a suggested indoor hand-patching session for 2–6 friends, including the host. Use a small hole in a non-stretch woven shirt or trousers, with sturdy fabric around it and access to both sides. Knitted jumpers, stretchy clothing, waterproof layers, linings and badly worn high-strain areas need different methods. If your garment is unsuitable, bring two scrap pieces and make a practice patch instead.
Choose a host who can demonstrate the patch on scrap before the meeting. Ask everyone what they are bringing so the host can check the fabric and match needles and thread in advance. Wash and dry the garment and patch according to their care instructions. Choose patch fabric of similar weight that can be washed with the garment. Agree on whether the patch and stitches should stand out or blend in; the garment's owner decides.
Have a needle, thread, patch, practice scraps and pins or clips for each person. Share fabric scissors and a ruler; use a pincushion or closed needle container for storage. Provide a well-lit table, a seat and elbow space for each person, plus one prepared example of the patch. A needle threader or thimble can help. Agree on a closing point before starting, leaving room to tidy up. Keep conversation soft enough for people to hear the demonstration.
Try the stitch on scrap first
Start with two scrap layers. Cut a manageable length of thread, about 30–40 cm. Put one end through the needle's eye and leave a short tail. Near the long end, make a little loop, pass the free end through it and pull tight to make a knot. Bring the needle up from underneath both layers. Push it down a short distance ahead, then up another short distance ahead: repeat to make a line of small dashes. Pull the thread through gently so the fabric stays flat.
To finish, make two or three small stitches over the same spot underneath, then trim the thread. Ask each person to show that they can start, stitch and finish before moving to clothing. This is practice, with help available; neat matching stitches are a skill to develop, not an entry requirement.
Patch your garment alongside friends
Fit the patch
Lay the garment flat. Cut a rectangular patch large enough to extend beyond all damaged or thin fabric into sound material. For this session, aim for about 2 cm of sound overlap on every side after folding the edges; enlarge it if needed. Fold roughly 5 mm of the patch's raw edges underneath and finger-press them. Center the patch on the outside of the garment and pin or clip it flat. The overlap and folded edge are practical choices for this beginner format.
Sew the perimeter
Keep the back of a trouser leg, sleeve or pocket out of the way so you sew only the intended layers. Secure fresh thread as in practice. Make small running stitches around the folded perimeter, catching patch and sound garment fabric each time. Move pins or clips out of the needle's path and return pins to storage as you remove them. Secure and trim the thread before it gets too short; restart with a fresh length when necessary.
Hold the layers together
Add parallel rows of running stitches across the patch. In sound areas, catch both patch and garment; over the hole there is only patch fabric to catch. Keep stitches small and tension relaxed. Secure each new thread and finish every length as in practice. Work at your own pace while others do the same. If you need help, park the needle in its holder and ask; the host checks on each person in turn.
Check, then share progress
When the patch is attached, remove all pins and inspect both sides. Check for loose edges, puckers and accidental stitching through a second garment layer. Gently flex the cloth; add stitches where an edge lifts, or loosen and redo a puckered section. At closing, each person may show what they repaired or learned. An unfinished patch is welcome: secure the current thread, remove all pins and store the needle before taking it home to finish.
Finish with a repair or a clear next step
There are no points, rankings, winners or ties. A completed patch covers the damaged area, lies comfortably and stays attached when the cloth is gently flexed. It does not need to look invisible. Check it again after wearing and washing; repair loose stitches before the hole grows.
The meeting ends at the agreed closing point, even if someone still has work to do. Go around once so everyone can share progress or pass. Say what remains on each unfinished repair, put tools away and check the table, clothing and floor for loose pins and needles. Leave with your own garment and any fabric the donor agreed you could keep.
Help people learn without taking over
Demonstrate one technique slowly rather than offering every kind of repair at once. Show the needle's path from both sides. Keep beginners close enough to see, check their first few stitches and revisit anyone who gets stuck. If nobody can demonstrate comfortably, use the practice-patch variation for the first meeting.
Ask before touching or cutting someone else's garment, undoing their stitches or taking a photograph. Offer advice, then let its owner choose the appearance. Share fabric and tools by agreement; if two people need the scissors, finish one cut and pass them. Do not compare speed or insist that someone complete a repair tonight.
If you sew a trouser leg shut, stop and carefully snip only the mistaken thread, separate the layers and redo that section. If fabric gathers, loosen the recent stitches and sew again with less tension. If the needle needs force, change the needle or material rather than pushing toward your fingers. Use a thimble if helpful; park needles between steps and pass scissors closed. Save extensive damage and repairs you cannot assess for someone with the relevant skill.
Already know the game?
Ideas & Twists
Choose a variation together before you start.
Mending circle · See main rules
House suggestion · start with scrapsPractice patch circle
Replace each damaged garment with a larger woven scrap and a smaller patch. Everyone makes the same perimeter and row stitches, so the host can demonstrate each stage to the whole group. No hole or cutting into clothing is needed. Keep the same needle, thread, scissors, ruler and pin or clip supplies. Finish when each person has a secure sample or reaches the closing point; show the stitch you learned, then store tools. Next time, bring a suitable garment.
Mending circle · See main rules
Established technique · suggested session formatPatch from the inside
Place the patch inside the garment instead of covering the hole from outside. Keep the same sound overlap and turn the patch edges under. Pin or clip the intended two layers, sew its perimeter and add running-stitch rows through patch and garment around and across the damaged area. The hole remains visible with patch fabric behind it, so the owner chooses a fabric they like seeing. Inspect both sides for loose edges or caught layers. Supplies, individual work, soft conversation and closing remain the same; this is a backed repair, not a promise of an invisible result.
Mending circle · See main rules
Established technique · suggested session formatScattered stitch patch
Keep the outside patch and sewn perimeter, but replace the parallel interior rows with scattered short running stitches, often called seed stitch. Bring the needle up and down to make one small dash, then move to a nearby spot and change direction. Spread stitches throughout the patch, catching garment fabric wherever it is present; do not leave all the holding stitches in one corner. Secure every thread length, keep the cloth flat and use the same final edge and layer check. Materials, closing and unscored sharing stay the same.
About this guide
The council's repair circle supplies a real social model; Ealing Repair Cafe and the sewing tutorials supply techniques. This guide's 2–6-person indoor session, scrap rehearsal, folded outside patch, overlap target, help order and closing routine are host suggestions, not official competition rules. The council listing describes a July 21, 2026 event; it is not a current booking recommendation. No purchased game edition is needed. The two alternate stitching formats draw on Ealing's patching guidance.
Ready for something different?
Find another game →