

The quick version
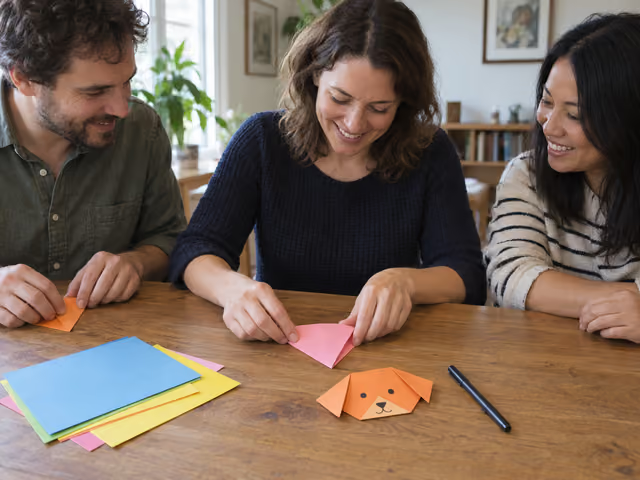
Give everyone square paper. With the color you want for the face underneath, fold the top corner down to the bottom corner. Fold the resulting triangle in half side to side, then reopen that last fold. With the long edge at the top and the point down, fold each side corner down for an ear, then both layers of the bottom tip up for the muzzle. Draw a face. Pause after every fold so everyone can follow, then share each finished dog.
Saved on this device only — clearing your browser's cache or site data removes them (no account backup).
Put square paper within reach
This is a suggested host format for 2–6 adults, including the demonstrator. Everyone makes a separate model; there are no teams. Choose a table where each person has a clear folding space and can see the demonstrator's hands. Sit alongside or angle seats so people can view the paper from the same direction, rather than trying to copy a mirror image.
Supply three pre-cut square sheets per person: one for a first attempt, one for a fresh attempt if needed, and one for another model or a twist. Thin origami paper around 15 × 15 cm is a practical host choice. Thin ordinary paper already cut into a true square also works for this simple model. A rectangle is not interchangeable with a square. Do not hand out heavy card or tiny squares for the first attempt. If sheets need cutting, prepare them before the session; scissors and rulers are not used during this format.
Keep one pen or felt-tip marker available for drawing faces; pass it around when needed. Scissors, glue, a timer and digital devices are not required. Read these instructions beforehand or bring them on paper. The demonstrator should practice the model before hosting and show a finished example if available; the practice sheet is additional to the three sheets per participant. A larger square for demonstrating is optional when hands or distance obscure the folds.
Agree to complete one dog face each and finish with a look at the group’s work. This is a folding session, not a speed contest or an art competition. Nobody must pose for a photo, explain a personal memory or exchange their model.
Fold one complete dog face
Work on the table. A crease is the line left by a fold; crease by pressing along the folded edge with a fingertip. Align corners first, hold them together with one hand, then smooth the fold with the other. In the steps below, top means the edge away from your body and bottom means toward you. Left and right refer to your own view. Keep this same view throughout.
Start with a diamond
Lay one square flat with a corner pointing away from you, one toward you and one to each side. If the sides have different colors, put the color you want for the dog's face underneath; the other side faces up. With plain paper, either side is fine. This is a square turned to look like a diamond, not a different paper shape.
Make a downward-pointing triangle
Lift the corner away from you and bring it onto the corner nearest you. Match those two corners and align the two pairs of sloping edges before pressing the fold. Leave it folded. You now have a two-layer triangle: a straight horizontal folded edge across the top, a left corner, a right corner, and two loose tips together at the bottom. The face color is now visible.
Find the middle, then reopen
Bring the right corner onto the left corner, folding the whole triangle in half sideways. Align the corners, lightly crease, then unfold only this sideways fold. Do not unfold the original square. Return to the broad triangle with its long edge at the top and its point down. The new crease runs from the middle of the top edge to the bottom point; use it to keep the ears balanced.
Turn the right corner into an ear
Keep the triangle in that orientation. Lift the right corner, taking both layers together, and swing it downward toward you. Make a slanted fold across that corner so its tip points down beside the right side of the face, rather than across the middle. Start the crease on the top edge roughly halfway between the center crease and the right corner; let its other end meet the adjacent right sloping edge. Adjust the angle before creasing so the ear hangs beside the face and leaves the center open. There is no hidden pocket or exact measured angle: compare with the demonstrator's drooping triangular ear.
Add the left ear
Keep the right ear folded. Lift the left corner, again taking both layers, and fold it down in the same way. Use the center crease as a guide: the two ear folds should begin at similar distances from the middle, and the tips should hang at about the same height on opposite sides. Adjust before pressing. You should now see a central face with a triangular ear on either side. Do not fold either ear across the center line.
Fold up the muzzle
Leave both ears down and keep the face toward you. At the bottom center, lift both loose layers of the downward point together. Fold that tip upward onto the front of the face, making a small triangle. A useful starting position is to bring the tip about halfway toward the center of the face; adjust so there is still room above it for eyes. Press a horizontal crease at the new bottom edge. The dog now has a flatter lower edge and a small upward-pointing triangular muzzle. Do not tuck the tip between layers or turn the whole model over.
Give the dog an expression
Lay the model flat and pass the pen around. Draw two eyes above the muzzle, a nose near the muzzle's upward tip, and a mouth if you want one. The fold is complete before decoration; dots for eyes and a small nose are enough. Leave the ears folded. Keep your model on the table while the others finish, or help by showing a step on your own paper.
After the first fold, everyone should have a point-down triangle. After the temporary sideways fold, everyone should be back to that broad triangle. After the ears, everyone should have two flaps hanging down with the face between them. These pauses prevent a small orientation mistake from becoming several wrong folds.
Share the result and finish together
When each person has finished or chosen to stop, place the models side by side. Offer each person a chance to point out a fold they learned or an expression they gave their dog; passing is fine. There are no points, winner, losing model or tie-breaker. Different ears and imperfect symmetry do not invalidate a model.
For another round, take a fresh square and repeat the same sequence, helping each other remember the orientation. Decide together whether to continue; completing one model each and sharing the results is a complete session. Owners keep their paper models. Ask before swapping or photographing them, collect unused paper and put scrap in the appropriate recycling or waste stream.
Help without taking over
Demonstrate one step, name the corners and edges, then let everyone do it. Check that each person's paper matches the current shape before moving on. Describe what your other hand holds still as well as what your folding hand moves. Let experienced folders help neighbors at their pace; finishing first earns no advantage. Ask before touching someone else's paper, and show a correction on your own model when possible.
If someone has a point-up triangle, rotate it on the table until the long folded edge is at the top and the loose point is down. If the center crease disappears, reopen only the temporary sideways fold. If an ear points across the face or covers the other ear, unfold just that ear and refold it downward. If corners will not line up on the first fold, check whether the paper is square and whether both corners really meet. Stop before creasing hard; do not force a mismatched edge into position.
A weak crease can be pressed again; a tear or several confusing creases may be easier to address with a fresh square. Let the folder choose. The spare sheets are for retries, not a penalty allowance. Do not discard or unfold someone else's work to fix it without asking.
For a disagreement about which flap moves, return to the last shared checkpoint and use the steps for this six-step-style dog face. Other dog tutorials legitimately add a tucked nose, chin, tongue or body; they are different sequences, not missing instructions here. Ear angle and muzzle size are shaping choices. This seated activity still calls for seeing or otherwise interpreting the folds and manipulating paper; ask what assistance the group wants rather than promising universal accessibility.
Already know the game?
Ideas & Twists
Choose a variation together before you start.
Origami · See main rules
Suggested cooperative variationOne fold, then teach it
After everyone completes the first dog, take a fresh square each. Rotate the demonstrator role clockwise after each folding step: first diagonal fold, temporary center crease and reopening, right ear, left ear, then muzzle. The current demonstrator explains and shows that step on their own sheet; everyone else follows on theirs. Cycle again if there are fewer than five people, or have the next person lead decoration if there are six. Anyone can ask the previous demonstrator for help or pass the role. Finish with one complete model each; there is no score or speed requirement.
Origami · See main rules
Suggested shaping variationA matched pair with different characters
Use two squares per person for this round and fold two dogs with the same sequence. On the second dog, deliberately change only the ear angle and muzzle size before adding a different expression. Put the two together and explain, or let others notice, which folds changed the character. Keep the square-to-triangle and center-crease steps unchanged; use no cuts or glued additions. This is a comparison of shapes, not a judged contest. Finish when each person has a pair or chooses to stop.
Origami · See main rules
Suggested paired variationFold a gift together
Pair up; with an odd number, make one group of three. Each person folds one dog on their own sheet while the partner or partners offer verbal help and demonstrate on their own paper. Do not take over someone else's sheet. Ask whether each person wants to exchange the completed models, keep them or simply show them; an exchange requires everyone's agreement. Decorate before offering the gift. Finish once every pair or trio has completed the model and made that choice. There are no points, compulsory swaps or extra materials.
About this guide
The complete model follows Wake County's dog-face photo sequence: square to triangle, temporary center crease, two drooping ears, upward bottom tip and drawn face. No commercial edition is required. The 2–6 hosting range, three sheets per person, approximate shaping landmarks, group finish, consent guidance and three twists are STUDplay host suggestions. OrigamiUSA and community discussion inform teaching. More detailed dog-face tutorials add different nose or chin folds; those steps are not imported. Source photos and diagrams are linked for reference, not reproduced as guide artwork.
Ready for something different?
Find another game →