

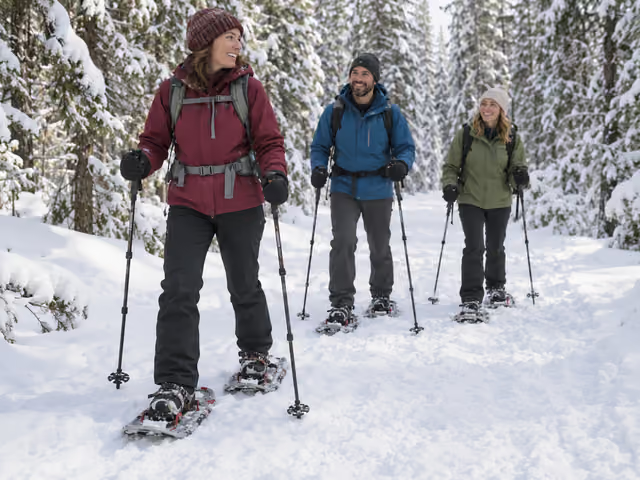
The quick version
Choose an open, marked and maintained snowshoe route with suitable snow, gentle terrain and no avalanche exposure. Confirm conditions and access, pack winter essentials and agree on a turnaround landmark and latest turnaround time. Fit the snowshoes on a level snowy area and practice walking and turning. Stay together, keep clear of ski tracks and turn back at the first limit or concern. Finish when everyone is back and your outside contact knows you have returned.
Saved on this device only — clearing your browser's cache or site data removes them (no account backup).
Choose the route and pack for winter
This guide hosts 2–6 adults on a daylight out-and-back walk along a marked, maintained winter route that explicitly allows snowshoeing. It is a host format, not a race or a universal park rule. Choose a short, gently rolling route with a straightforward return to the same trailhead. Maintenance means someone looks after the route; it does not establish today's safety, snow depth or avalanche exposure.
Ask the land manager or winter-trail operator about current snow, hazards, closures, markings, trail sharing, fees, reservations, rental availability, parking and road or gate closing times. Check the local weather and, where relevant, avalanche forecast. Avoid routes crossing or below avalanche slopes, steep icy sections, exposed drop-offs, lakes, streams or snow-covered drainages. If you cannot establish an appropriate route for the group, book a qualified guided introduction or choose another outing. A summer route description or other people's footprints is insufficient.
Tell everyone the route, expected effort, required clothing, cost and return plan before they agree to come. Pick an identifiable turnaround landmark and a latest turnaround time that leaves a generous return margin before darkness and any access closure. Use the slower person's comfort and current conditions to set that margin; outward and return travel need not take the same time. Leave your route, names, expected return and an overdue-response plan with someone staying behind.
- Each person needs one pair of snowshoes with intact decks, traction and bindings, suitable for the route and snow. Select size using that model's instructions and total carried load, including clothing, pack and water; boot size alone does not determine flotation. Ask the rental staff to check boot compatibility and show how that binding works.
- Wear warm water-resistant winter boots, warm socks, a hat, gloves and layers suited to the forecast, including protection from wind and wet snow. Carry extra insulation and dry gloves or socks. Gaiters help keep snow out of boots. Bring sunglasses and sunscreen.
- Each person carries a daypack with water protected from freezing, food plus a reserve, a headlamp with spare power, personal medication, a whistle and an emergency bivy or other shelter appropriate to the cold.
- Between you, carry a printed route map, compass and someone able to use them, a first-aid kit, binding repair supplies appropriate to your snowshoes, a multi-tool, waterproof matches or lighter and fire-starting supplies. Know local fire restrictions; carrying supplies is not permission to light a fire. Add any site-specific winter equipment the operator requires.
- This format also carries at least one charged phone with a clock, an offline route map and spare power, protected from cold. Check the clock at pauses against the agreed latest turnaround time. Check how to contact local emergency services. Coverage may be absent; a phone complements the paper map and agreed response plan. If the route needs a more capable communication system, arrange it or change the route.
- Adjustable trekking poles with snow baskets are recommended for balance and may be required by your operator; they are optional in the main format. Learn their adjustments and keep points clear of other people.
This inventory is for the bounded beginner route. Mountain backcountry travel can require additional overnight equipment, avalanche rescue equipment and practiced skills. Carrying a transceiver does not make avalanche terrain suitable for this outing. Follow the chosen site's requirements or change the plan.
Fit the snowshoes before heading away
On a level snow-covered practice area near the start, follow the exact binding instructions: check left and right if marked, center the boot as directed and fasten the straps securely without restricting circulation. Many snowshoe bindings let your heel lift while the deck trails behind; do not tie the heel down to the deck to imitate an ordinary shoe. Test a few steps, stop and recheck the straps. Keep sharp traction points off bare indoor floors and away from hands.
Practice a comfortable stride that clears one snowshoe past the other. Make a broad turn with several small steps rather than twisting sharply on a planted foot. Leave space between people for decks and pole tips. Stop and ask for help with persistent catching, loose bindings or painful movement before committing to the route. Agree that anyone can ask the whole group to stop or return.
Walk, regroup and return together
Start at a conversational pace
Choose someone familiar with the route to lead and, with three or more, someone to stay last. With two, keep each other in view. Use the slowest comfortable pace rather than trying to match summer hiking speed. The guide is a shared outing, so there are no player turns; people can change lead positions only after regrouping.
Stay on the agreed route
Keep everyone within sight and regroup at junctions before choosing a direction. Follow route markers and your map. Do not take an apparent shortcut through deeper snow, follow unfamiliar tracks or step onto frozen water. Where snowshoeing is permitted beside skiing, stay clear of set ski tracks and any groomed lane reserved for skiers, and yield as posted. Some ski trails prohibit snowshoeing entirely.
Check comfort and progress
At agreed pauses, count the group and check warmth, energy, water, bindings, weather and remaining daylight. Adjust layers before becoming sweaty or chilled. Stop in a safe wide place without blocking the trail. If a snowshoe clumps with snow or a strap loosens, pause and clear or adjust it as the manufacturer directs; nobody continues alone while someone repairs equipment.
Turn at the earliest limit
Return when you reach the chosen landmark, the latest turnaround time, or anyone's need to return, whichever happens first. Turn sooner for deteriorating visibility, unexpected terrain, uncertain navigation, loss of traction, fatigue, cold or an equipment problem. The return is part of the outing, not a reward for reaching the landmark. Do not vote a struggling person into continuing or leave them to return alone.
Close the outing
Retrace the agreed route and count everyone at the trailhead. Remove snowshoes on a suitable surface, return rentals and notify the outside contact that the group is back. There are no points, winners or ties: a shortened outing is a completed outing when the group returns together. Agree on any next trip after everyone is warm and comfortable.
Before leaving, ask: 'If we reach our turnaround time before the landmark, what happens?' Everyone should be able to answer: 'We turn back together.' Then practice a stop and a broad turn on the level snow.
Make the decisions easy for the group
Snowshoes supply flotation for soft snow; they are not automatically the right tool for hard ice or every packed trail. If the operator says today's route needs different traction or lacks suitable snow, revise the outing before starting. Do not remove snowshoes and punch deep boot holes into a shared trail, or assume a permitted path stays equally firm on the return.
Settle route and access questions through signs and the land manager, not another visitor's confidence. Any request to shorten the trip takes priority over the planned landmark. Keep quieter members involved with a direct comfort check at pauses, and ask before helping someone adjust clothing, bindings or stand up after a fall. Trail walking is sustained movement on uneven snow; offer a different activity if that demand does not suit someone.
For a fall, stop the group, make space and ask whether the person is hurt before helping. Do not pull them upright by their poles or make them continue to preserve the plan. For an injury, lost person or inability to return, use the agreed emergency plan, contact local emergency services when possible and avoid sending an inexperienced person away alone. This guide does not teach rescue or avalanche assessment. Resolve uncertainty early through the operator or an experienced qualified guide.
Observation stops work best when brief enough to stay warm. Quiet conversation is welcome; give wildlife space, keep food packed away and leave plants and tracks undisturbed. Keep optional photos voluntary and take them from the permitted route. A cold-weather setting is not a reason to pressure anyone into a photo or a longer walk.
Already know the game?
Ideas & Twists
Choose a variation together before you start.
Snowshoeing · See main rules
Host suggestion · shorter routeNear-trailhead tryout
Replace the main turnaround landmark with a nearby marked point on the same approved route. Practice fitting, walking, stopping and broad turns, then return as a group; continuing farther is a new decision made back at the trailhead. Keep the winter inventory, outside contact and latest turnaround time. There is no speed test or minimum distance to earn completion.
Snowshoeing · See main rules
Host suggestion · operator-ledGuided first outing
Book a qualified operator's beginner snowshoe session instead of leading the route yourselves. Confirm its current route, participant limit, required gear, costs, cancellation conditions and emergency arrangements before everyone agrees. Follow the guide's briefing, technique and turnaround decisions; do not apply this guide's 2–6 range as an operator booking guarantee. Finish at the operator's agreed return point with everyone accounted for and notify your outside contact. No scoring is added.
Snowshoeing · See main rules
Host suggestion · shared observationWinter noticing stops
Before starting, choose two safe wide stopping places on the approved route, both before the turnaround limit. At each, anyone who wishes can share one thing noticed from the path: a tree shape, snow texture or distant sound. Observation replaces some continuous walking time, so shorten the outward distance if needed and keep the same latest turnaround. Stay on the route, leave tracks and wildlife alone, and skip a stop if people are cold. No objects, photos, points or off-trail searching are required.
About this guide
Reviewed October 2, 2026. Snowshoeing has no universal game rulebook or purchased edition. The 2–6-person daylight out-and-back, shared pacing and turnaround procedure are this guide's host format. Park rules are site-specific: Yellowstone permits some shared routes, while Pictured Rocks prohibits snowshoeing on groomed ski trails. Mount Rainier's lead source was last updated August 12, 2024; it describes mountain routes and a winter rescue inventory, not a current access guarantee or proof every listed route fits this beginner format. Confirm the chosen operator's current conditions and requirements. All three variations are host suggestions.
- NPS · Beginner's Guide to Snowshoeing (Mount Rainier) ↗
- NPS · Winter Hiking Tips ↗
- NPS · Snowshoeing in Rocky Mountain National Park ↗
- NPS · Ten Essentials ↗
- Cascade Designs / MSR · Snowshoe sizing ↗
- Cascade Designs / MSR · Terrain and bindings ↗
- NPS · Yellowstone trail etiquette ↗
- NPS · Pictured Rocks winter trail restrictions ↗
- NPS · Mount Rainier winter safety ↗
Ready for something different?
Find another game →