

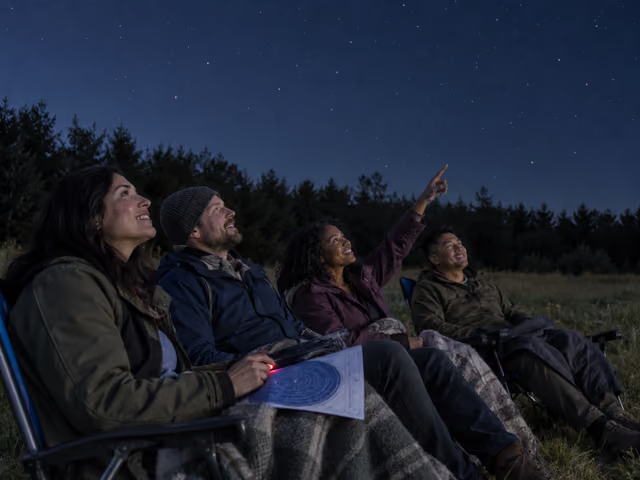
The quick version
Check clouds, Moon times and permission to use the site after dark. Bring a matching printed sky chart, dim red light, chairs and layers. Once seated, put bright screens away and let your eyes adjust. Start with one bright pattern; take turns helping the group find it and nearby stars. Finish at your agreed departure time with a favorite sight from anyone who wants to share.
Saved on this device only — clearing your browser's cache or site data removes them (no account backup).
Choose the place and prepare the chart
This guide uses a seated, naked-eye outing for 2–8 friends. Choose a familiar backyard or permitted park with open sky, level ground, a clear way back and room for everyone's chair. Check closing times, access after dark and any reservation requirements. Arrive while you can see the ground; stay clear of roads, water edges and steep drops. Agree on transport, where to meet and when to leave.
Check cloud cover, temperature and the Moon's phase and rise/set times for that place and date. A Moon below the horizon makes faint stars easier to see; a bright Moon can be worth watching but washes out fainter sights. Cancel or reschedule for poor weather. Pick a place and return route everyone is comfortable using after dark.
Bring one printed naked-eye sky chart showing your location, date and intended observing time. A library astronomy guide or printable astronomy chart can supply one; read its instructions before leaving. An all-sky chart shows the horizon around its edge and overhead near its center. If using a rotating star wheel instead, choose its hemisphere/latitude edition, set the date and time, and follow its daylight-saving and local-time corrections. Pick three bright stars or patterns shown above your horizon as possible starting targets; do not assume Orion, the Big Dipper or a planet is visible everywhere.
Each person brings a comfortable outdoor chair and suitable layers. Bring a dim red flashlight for chart reading and getting around, with enough light available for the return route. Keep it pointed down. Optional binoculars belong to the binocular variation below. Agree to use soft voices and keep bright screens tucked away during observing; someone can still use a phone or brighter light when needed for safety.
Look up and share what you find
Settle and get oriented
Place chairs where everyone has a useful view. Identify north, south, east and west from familiar landmarks or your site map before it gets dark. Sit back, turn unnecessary lights off and start looking. Allow roughly 20–30 minutes for eyes to adapt; you can enjoy bright stars during that time rather than waiting to begin.
Find the first pattern together
The host chooses one bright target from the prepared chart. Face that direction and rotate the chart so that direction's horizon label is at the bottom, following the chart's instructions. Compare only that part with the sky. Point with your hand and describe a landmark, height and shape: 'Above that tree, find the three close stars in a line.' Match neighboring stars as well as the brightest point before naming it.
Let the next person lead
Move around the chairs, giving each willing person a chance to point out a target or describe something they notice. Passing is fine. Others help compare the chart; take a short hop from a known bright star to a nearby pattern instead of trying to identify the whole sky. There is no speed test, and someone can keep observing quietly.
Leave room to simply watch
Between targets, rest back and watch freely. You may notice a moving light or a brief streak; describe what you saw before guessing its identity. A dated chart or reliable observing guide can help check a planet, but a star wheel alone does not give current planetary positions. If a target is hidden by trees, cloud or glare, skip it or try another visible one.
Close the session together
At the agreed departure time, invite each person to name a favorite sight or one question to explore later. Stargazing has no points, winner or tie; identifying every target is not a condition of finishing. End earlier if anyone is cold, uncomfortable or weather changes. Account for the group and belongings, restore lights as needed, and leave together by the planned route.
Make the same sky easy to share
Standards of success are small: seeing the same pattern as a friend can be enough. Ask 'Which part can you see?' and start from that landmark. Do not insist that everyone sees a faint object. The sky's appearance depends on local light, weather and your eyes; it will not look like a colorful long-exposure photograph.
If two people disagree about a name, check the chart's place, date, time and direction, then compare neighboring stars. Leave it unidentified if the match is uncertain. If clouds cover the sky, close the session or agree to reschedule instead of waiting for a promised sight. Never guarantee a meteor, planet or Milky Way view.
Keep the chart light dim and aimed at the page. Tell friends before using a bright light; route safety takes priority over preserving night vision. Use hand pointing rather than a laser pointer. At a public star party, follow the organizer's light, parking and equipment rules, and ask before touching another observer's telescope.
Let friends choose their seating and take breaks from looking upward. The turn order, three starting targets and closing check-in are hosting suggestions, not official astronomy rules.
Already know the game?
Ideas & Twists
Choose a variation together before you start.
Stargazing · See main rules
House suggestionConstellation stories
Before leaving, bring a short printed account from a named astronomy or cultural source for two patterns that may be visible. After locating each pattern, one willing person shares the account and names its source or tradition; others describe the shapes they see. Separate an invented group story from that sourced account. If a pattern is hidden, choose a visible prepared one or skip the story. Continue the usual observing turns and finish with a favorite sight.
Stargazing · See main rules
House suggestionRevisit one patch
Choose a visible bright pattern and note its position relative to a fixed tree or roofline from your chair. Observe other targets, then return to the same chair near the end and compare the pattern's position. Use your printed chart at the later time to check the change; make no promise that a short session produces an obvious shift. Compare observations without points, then use the normal closing check-in.
About this guide
Astronomy guidance supports naked-eye observing, chart use, low-light etiquette and preparation. The 2–8 group, seated turns, target shortlist, finish and story/revisit formats are suggested ways to host friends. Binoculars are an optional extension. Use current local conditions and chart instructions; no particular celestial sight is promised.
- Sky & Telescope · Stargazing Basics ↗
- Sky & Telescope · Learn Constellations with a Planisphere ↗
- National Park Service · Stargazing 101 ↗
- National Park Service · Astronomy ↗
- National Park Service · Where to Stargaze ↗
- PBS Seeing in the Dark · Your Sky Tonight ↗
- PBS Seeing in the Dark · Observation Guides ↗
Ready for something different?
Find another game →